Setting up and hardening my VPS
I’ve been toying with the idea of getting a VPS for hosting servers [Mumble, etc.] or quickly make/setup something up at home when I’m away, but mainly to bypass my internet provider’s NAT. This problem has been haunting me since childhood, when I wanted to set up a Minecraft server and play with friends, but the ever-present “port forwarding” was the stumbling block to all my efforts.
Why
I always like to start by explaining why I’m doing these things in the first place. Here it’s clear: the main goal is essentially a proxy, simply to bypass NAT. Just what I wrote above, but that’s not all.
I see this as an opportunity to get my hands on the actual administration of a Linux server that isn’t tucked away in a closet at my place, where the only threat is a power outage. As a Linux user who likes FOSS and the like, I want to get a feel for real Linux server security. By that, I don’t just mean turning on UFW and then spending half an hour figuring out why I can’t SSH in. I’ve heard about fail2ban, knockd, and the like more than once, and their operating principles fascinated me; and actually revealed how server protection can be intimidating, but also very educational. I personally didn’t expect it to be so easy (within the context of a home lab/home setup.. certainly not in a professional environment ;) ).
I’d say my biggest inspirations were the “Welcome to the Game” series and the MSI router I got from a teacher in high school. In both cases, I encountered “time-limited access”. Whether in the game, where players could only connect to certain pages at specific times, or that old router, which had a “from when to when” port permission option in its web GUI.
That router in particular caught my attention. It’s a damn old MSI, which sometimes goes into a “half-dead” state and I have to reset it to factory settings. Then that knowledge spilled over into that game, where I’ve realized that the “bad guys” don’t actually wait until exactly 3:00 PM to manually run ufw allow X/Y, but simply set up some rule, whether in a some network device or some systemd timer.
Choosing a Hosting Provider [No Sponsorship]
I’m human, which means I’m lazy, and I like to tinker with automation, which means I’m extra lazy.
I went to CZ.NIC and checked if my domain was available. I immediately looked at the registrars and picked the “best” one. That led me to ZONER, aka czechia.com, aka ZONER CLOUD, call it what you will idc no more.
I bought the volchar.dev domain on czechia.com and a VPS Basic on ZONER CLOUD. I don’t get the disorganization in the names…
Battle Plan for Operation “VPS”
I won’t lie, despite me being extremely lazy, I’m also extremely paranoid. So before even turning on the VPS, I looked online and on YouTube to see how to thoroughly secure it. Based on the basic information I gathered, I decided on the following:
‘Create a non-root user in the SUDO group as quickly as possible’
- So that I can disable logging in as ROOT via SSH
‘Create PUB and PRIV keys for SSH; password-less login per device’
- So if someone wants to connect, they must have a key and I can disable password logins
‘Change the ports on the services I will be providing’
- SSH isn’t on 22, so WG isn’t on default port, etc., but this isn’t a hard rule.
‘UFW will ignore pings, it can’t be seen, it doesn’t respond, as if it wasn’t there in the first place’
‘Fail2ban, knockd, disable ports I’m not currently using’
‘Automatic updates for security-related packages’
With this setup, I have a fortress that can only be accessed if you: have a valid key, are on the guest list, and don’t ban yourself after a few failed attempts.
A Little Look into the Future
Continuing with this metaphor, other paths aren’t obvious, if they even exist. Only SSH is open 24/7, and I enable the services I occasionally use via on/off scripts before and after use.
Yes, I know that even a uninitiated script kiddie is able to check and learn these ports etc. But that’s few more obstacles to jump over, therefore I believe that even this can detter some low-lives.
Back to the past
This might seem like overkill, even paranoid to some, but I’m doing this just in case I forget about the VPS later or don’t have much time to manage it, so that it’s as secure as possible from the very start and is effectively impenetrable when idle.
First connection to the VPS
For security reasons, all specific information (ports, user names, etc.) will be redacted. What’s the point of changing the port if I’m just going to post it on my blog? FOR THE PURPOSES OF THIS BLOG, I WILL USE THE “VOLCH” AS STAND IN NAME FOR THE USER ON THE VPS I have that on my PC, and it’s also listed in the About Me section.
User
Based on my research, I felt that this step was crucial. After all, “root privileges” is something I see frequently on LinkedIn in the fields of cybersecurity and exploits.
I created a user using the following command:
adduser volch # obviously a different name ;)
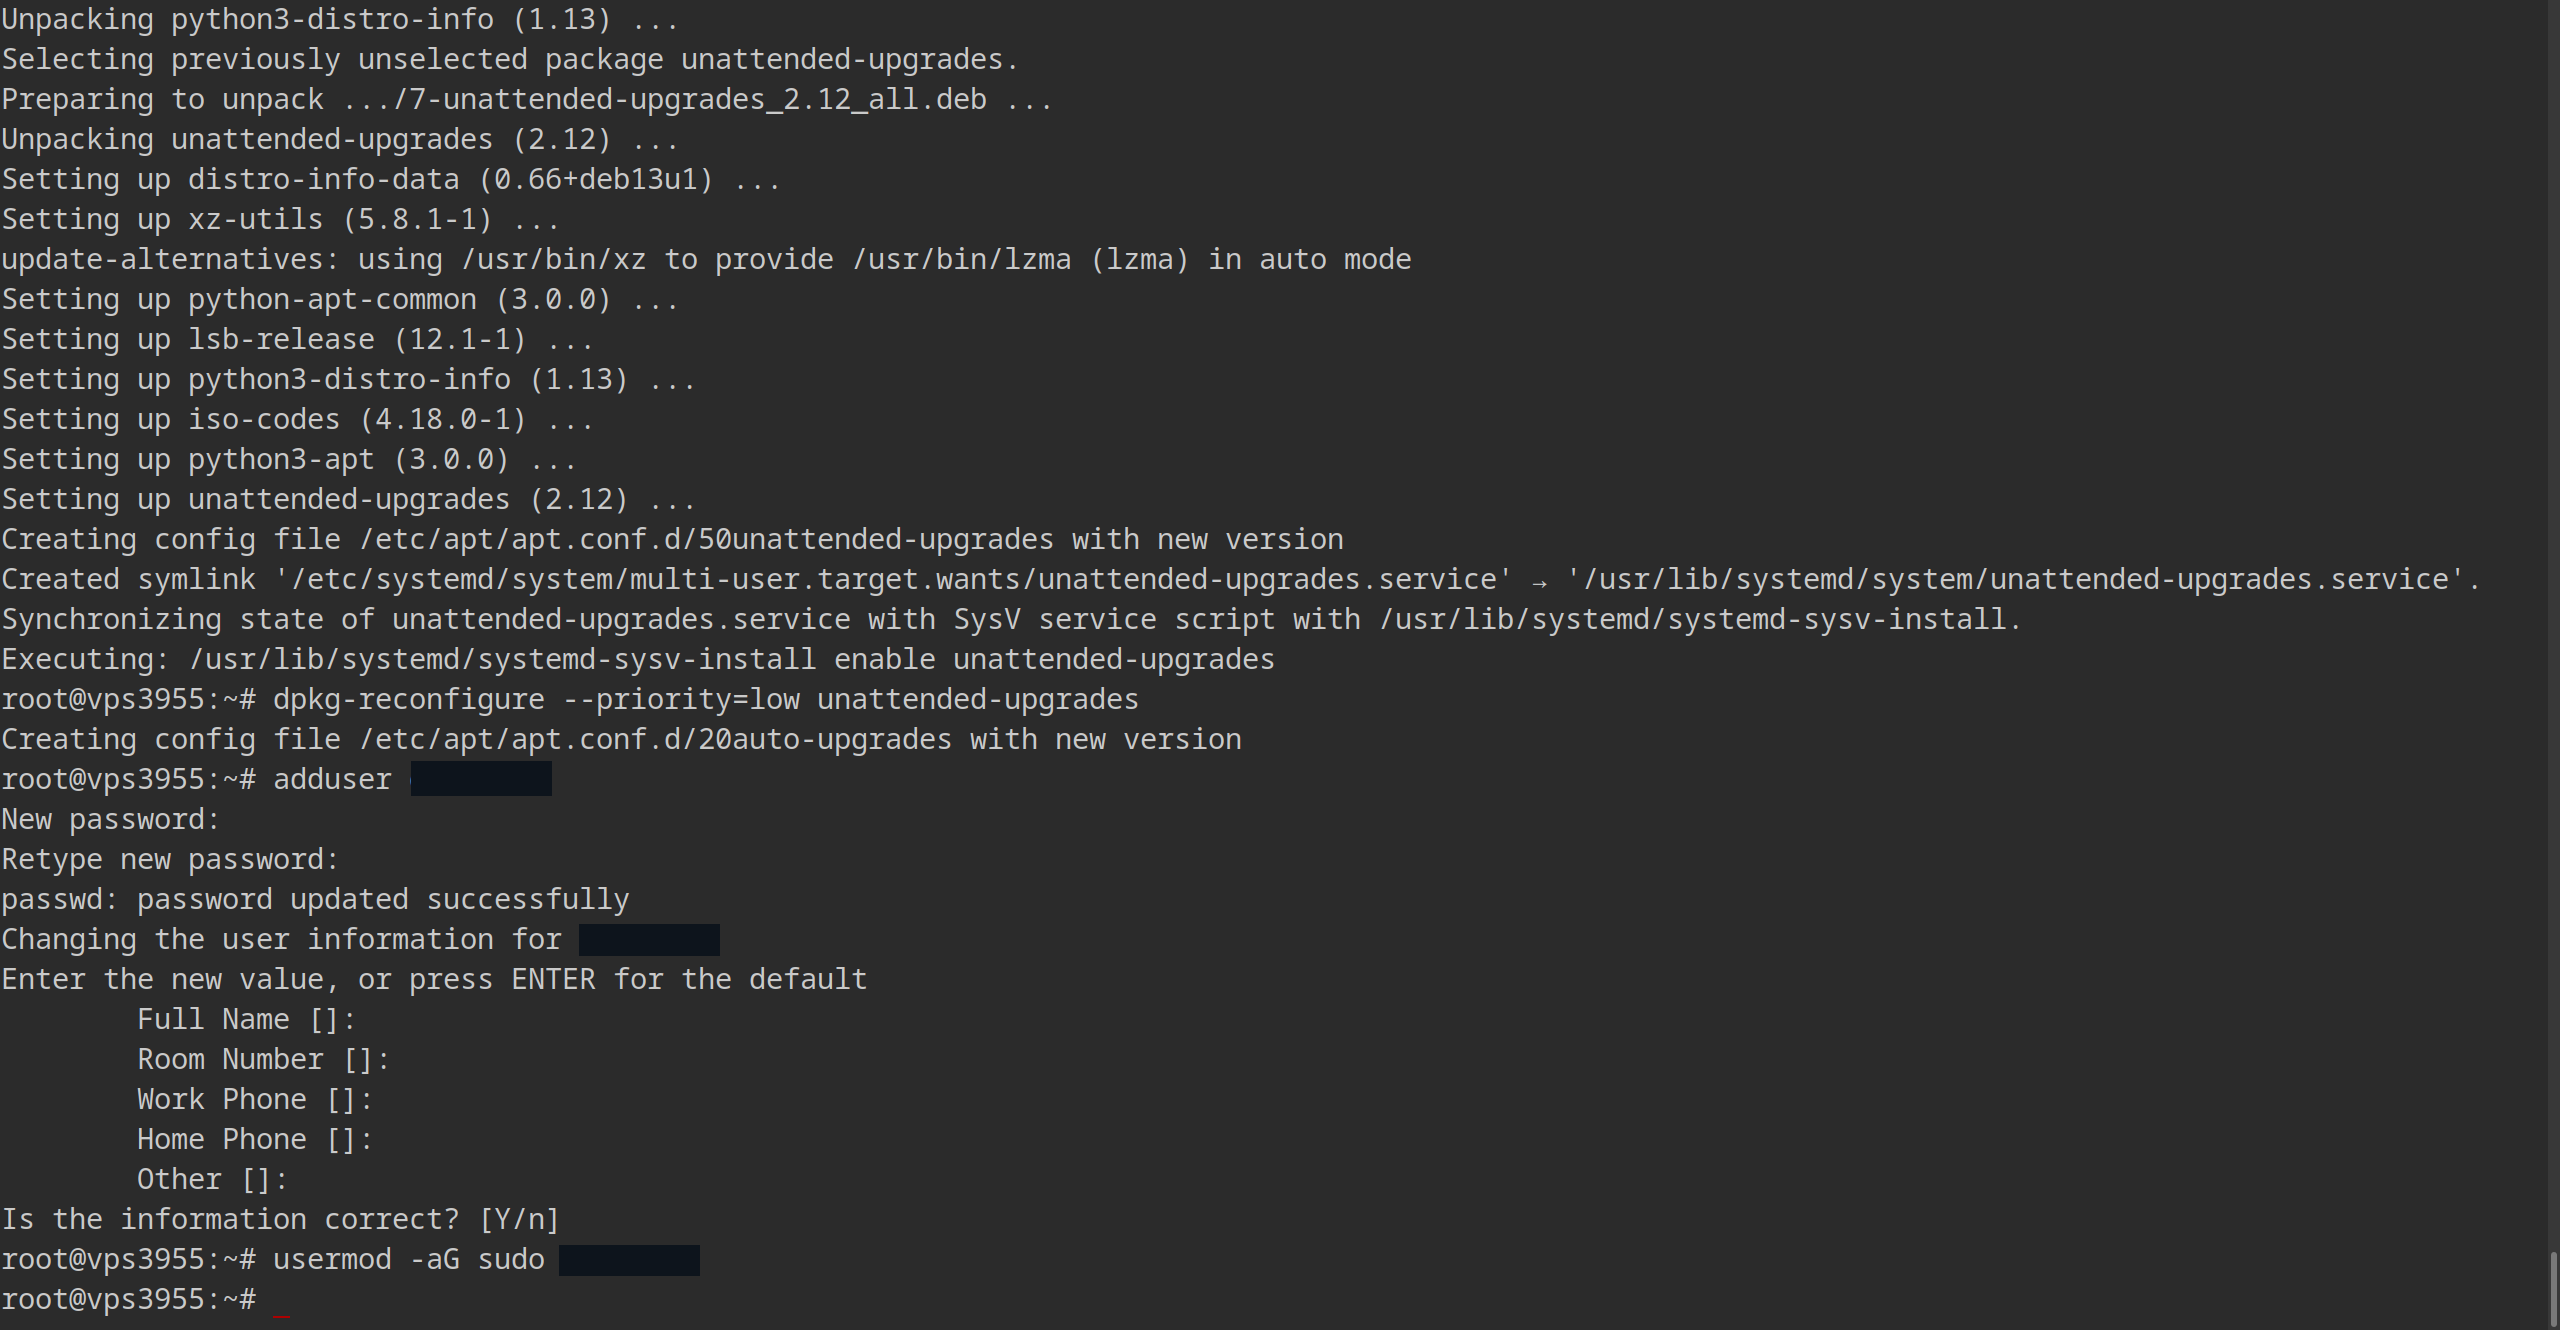
And then I assigned privileges to it:
usermod -aG sudo volch
Where the flags - ‘a’ – append, add | ‘G’ – Group, group - added my new user to the SUDO group.
After successfully logging in, I decided to generate a key on my PC and was able to disable “plain-text-passwords”.
Generating an SSH Key
Generating the key was, once again, simple. I generated the key on my own computer, which I’ll use to connect to the VPS. I also set a passphrase:
ssh-keygen -b 4096
The reason I didn’t go for a larger number is that it doesn’t add much value and actually has a negative impact. Also, in hindsight, I could have used “ed25519” instead of “RSA”, which is the default for ssh-keygen.
I only realized this when generating a key for my laptop. In terms of security, both types are relatively equivalent. We’re talking more about convention and “efficiency” here. For home use, both options are more than sufficient, and I’d go so far as to say that simply having a key at all puts me in a better position than 1/3 of servers in a not very professional environment.
After generating the key, I sent the public key to the VPS:
ssh-copy-id volch@ipOfMyVPS
To test it, I then tried connecting from another terminal, and it worked.
That’s not all, though, I also had to force the system so that no one could log in normally using a typed password.
This is done in the SSH server settings.
Strengthening SSH Security
To do this, I had to edit the SSH config file:
sudo vim /etc/ssh/sshd_config

-bash : vimm : command not found

sudo apt install vim -y && sudo vim /etc/ssh/sshd_config # oops!
No, I don’t use ‘vim’ just to get Linux points. I use ‘vim’ because I find ‘nano’ less intuitive. Most importantly, I had enough brainpower to type “vim tutorial” into Google and discover that ‘vim’ has its own documentation.
What did I change?
Port: anythingOtherThan22 # to prevent bot scans of my VPS

AddressFamily inet # Use IPv4 only

PermitRootLogin no # Can I log in as root? No

PasswordAuthentication no # No password authentication

:wq # w - write | q - quit
Again, I had to test the new settings from another terminal, and everything went smoothly. Except that I had to add -p anythingOtherThan22 to the command… oops, for the second time :D
Now that I had patched up SSH, partially “disabled” root, and users with SUDO privileges, it was time to patch the ports themselves.
UncomplicatedFireWall
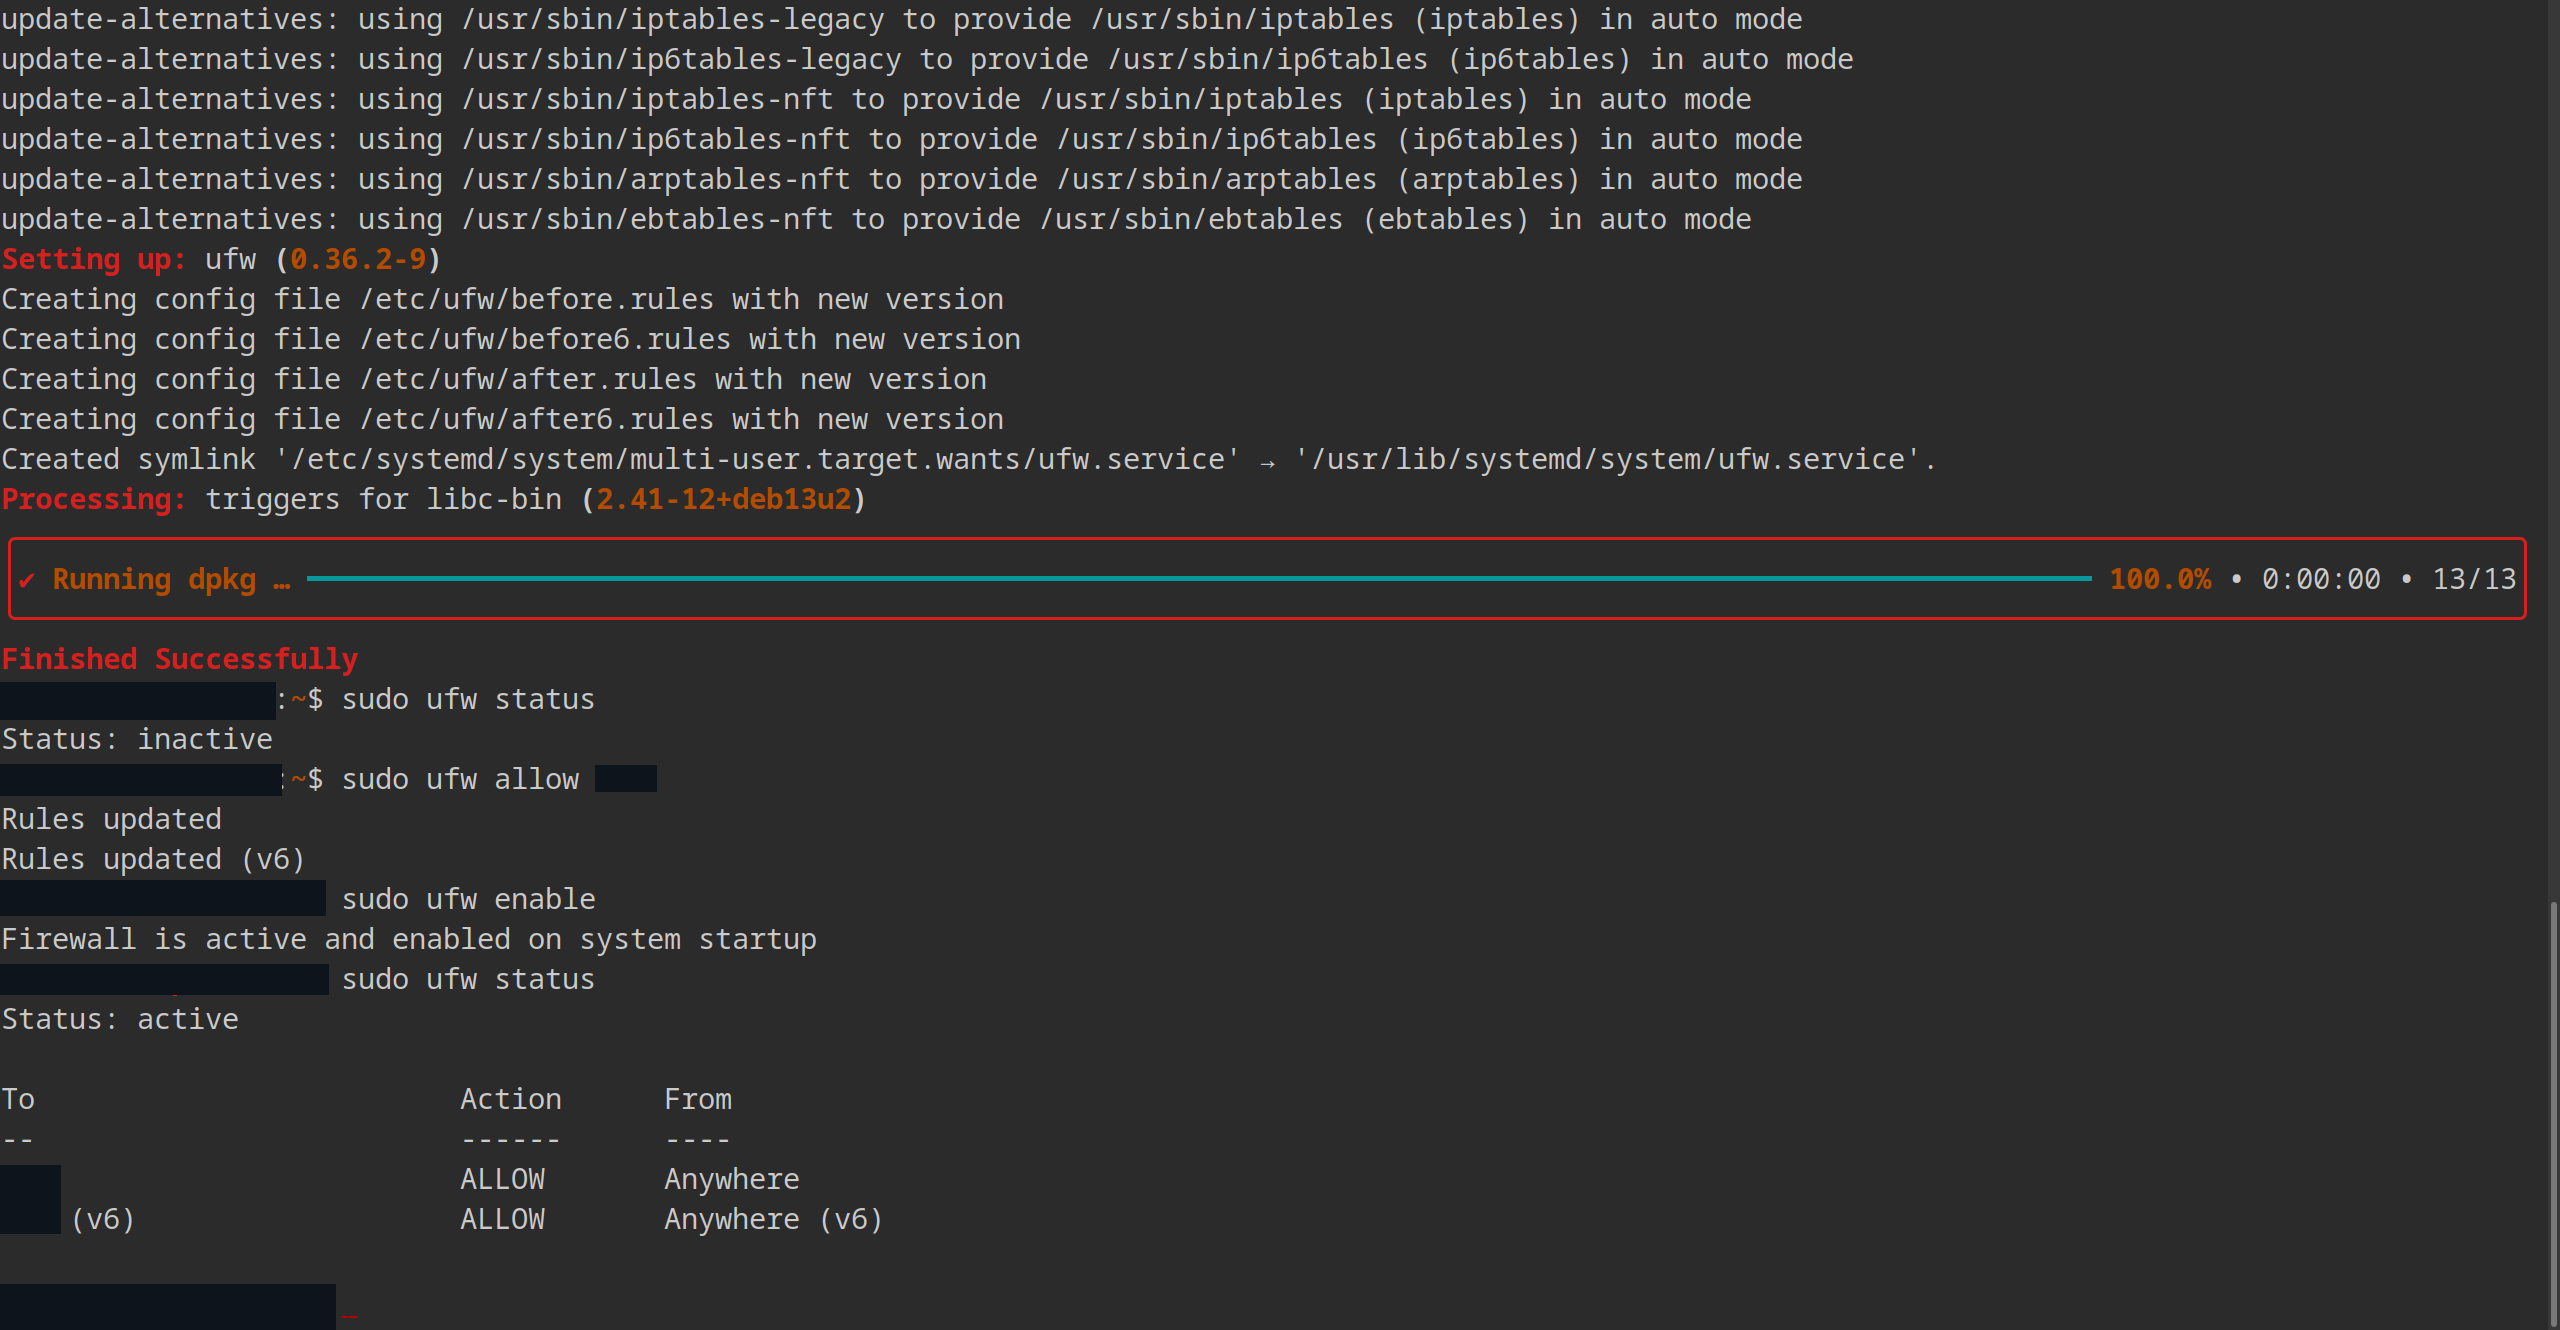
Debian 13 doesn’t come with ‘ufw’ pre-installed… just like Vim… so I had to install it first:
sudo apt install ufw -y
After installing ‘ufw’, I opened my SSH port:
sudo ufw allow anythingOtherThan22
Only THEN did I enable ‘ufw’. If I had done it the other way around and it had been a dedicated server somewhere on the other side of the country, I would have had to make a very unpleasant trip. Otherwise, I would just have had to go to the web console.
The ceremonial activation went something like this:
sudo ufw enable

Command may disrupt existing ssh connections. Proceed with operation (y | n)? y

Firewall is active and enabled on system startup
If it weren’t for NetworkChuck’s video, I would have stopped here, but he suggested something I didn’t even know was possible: disabling responses to pings.
NetworkChuck said that’s the best defense against bots. If it doesn’t respond, there’s an 80% chance it’s dead!
He did this by editing the ‘/etc/ufw/before.rules’ file:
-A ufw-before-input -p icmp --icmp-type echo-request -j DROP
# Translation: don't respond to pings.
And the subsequent test…
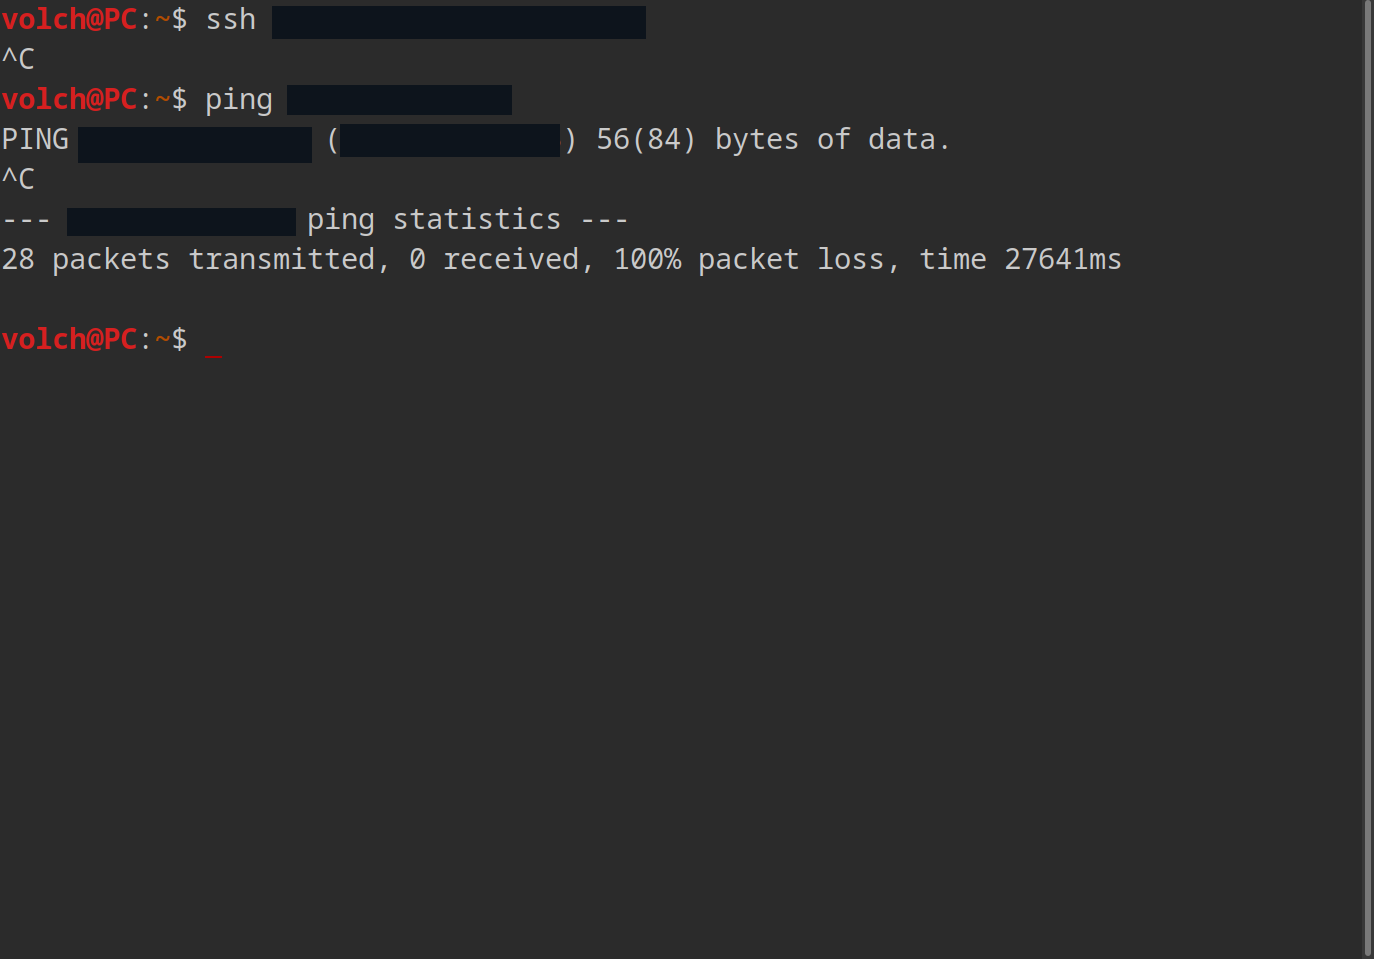
Everything works!